Installation extra light / led bar Tesla Model S (5.2016-2020)
29.11.2022
The manual applies to the installation of "regular" additional lights on the Tesla Model S facelift (produced 5.2016 - 2021) . For the installation of Lazer additional lights with "SMART function", see the additional manual here for more information on connecting the ALC and wireless relay.
© Bilkomponenter AS
Version 1.0
Reservation
Read the entire manual before starting the installation and make sure you understand all aspects of the assembly.
The manual assumes that you use bilkomponenter.no's light packages including the ALC control power adapter.
NB! ALC can only be used for controlling 12V relay wiring. ALC must under no circumstances be connected directly to a light source / LED.
In case of problems along the way, spend a maximum of 30-60 minutes on troubleshooting. Contact bilkomponenter.no if you have problems for which you cannot find an immediate solution.
Bilkomponenter AS is not responsible for any damage or errors you cause to the car during installation.
Tool
To carry out the installation, the following tools/equipment are required as a minimum:
- 10 mm pipe
- 12 mm pipe / spanner
- 13 mm pipe / spanner
- Ratchet
- Plastic tool for dismantling plastic covers
- Flat screwdriver
- Drill
- 3-4 mm drill bit
- 4 pcs. coarse-threaded screws, preferably construction screws / farmer screws (optional)
Dismantling
- Open the hood
- Remove the top cover towards the pane - lift straight up
- Then remove the two side covers, and finally the small cover at the front
- Remove the rubber strip around the fruit tub
- Disconnect the light and emergency release behind the carpet in the shower cubicle
- Lift out the felt carpet and unscrew the two 10 mm bolts on each side
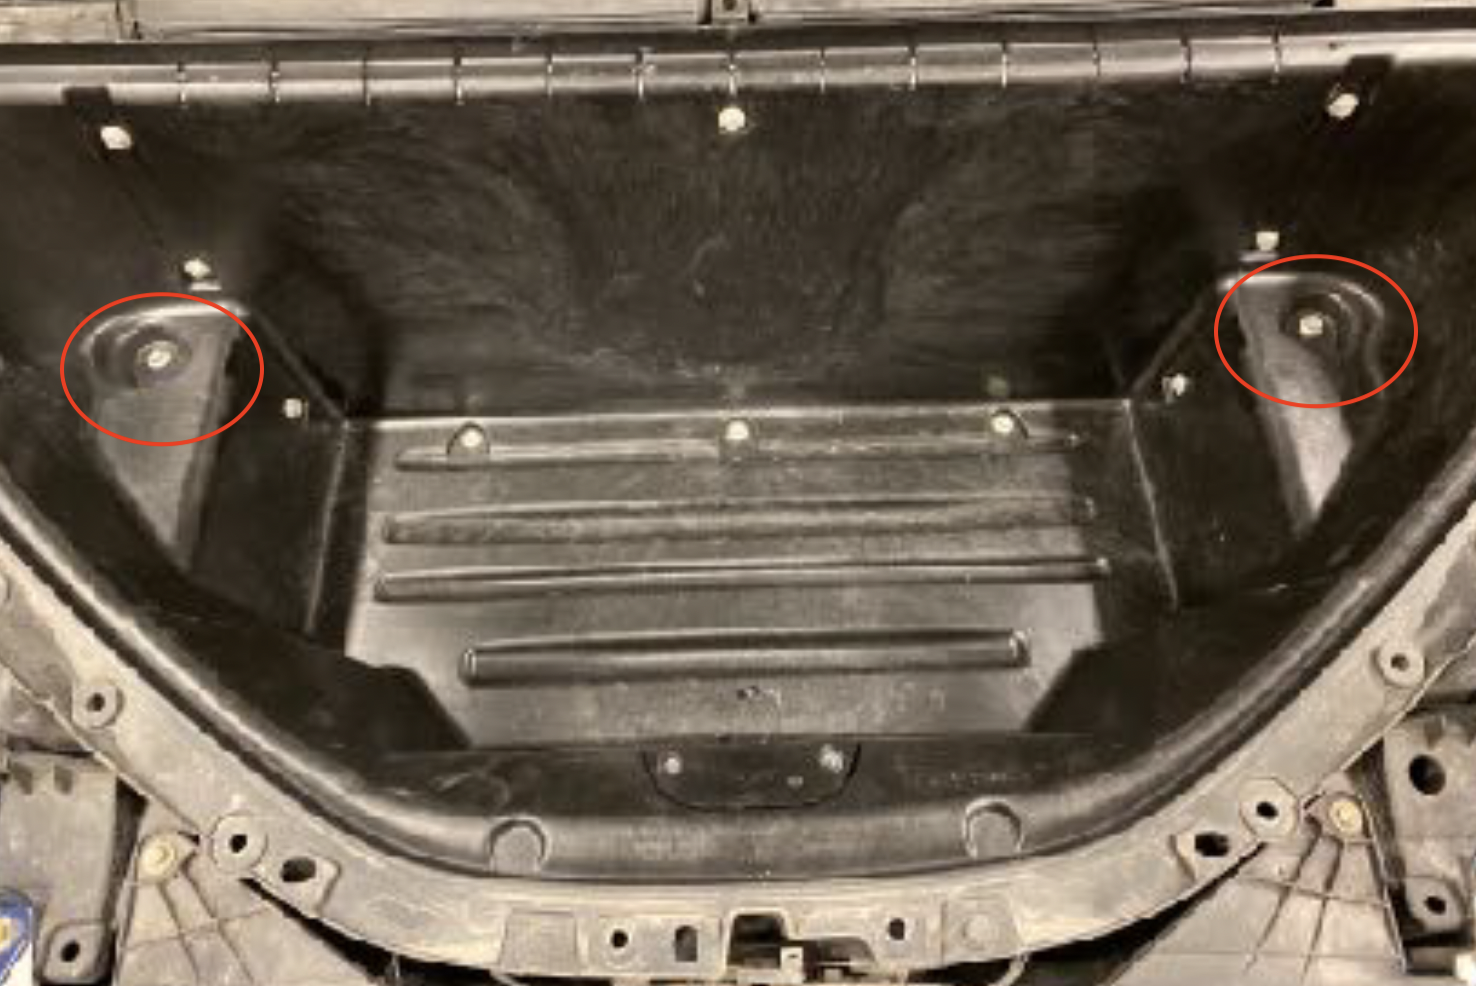
- Remove the two clips in the front of the frill
-
Loosen the rubber grommet and the wires for the light and emergency opener so that you can completely free the frunk tub before it is lifted out.
-
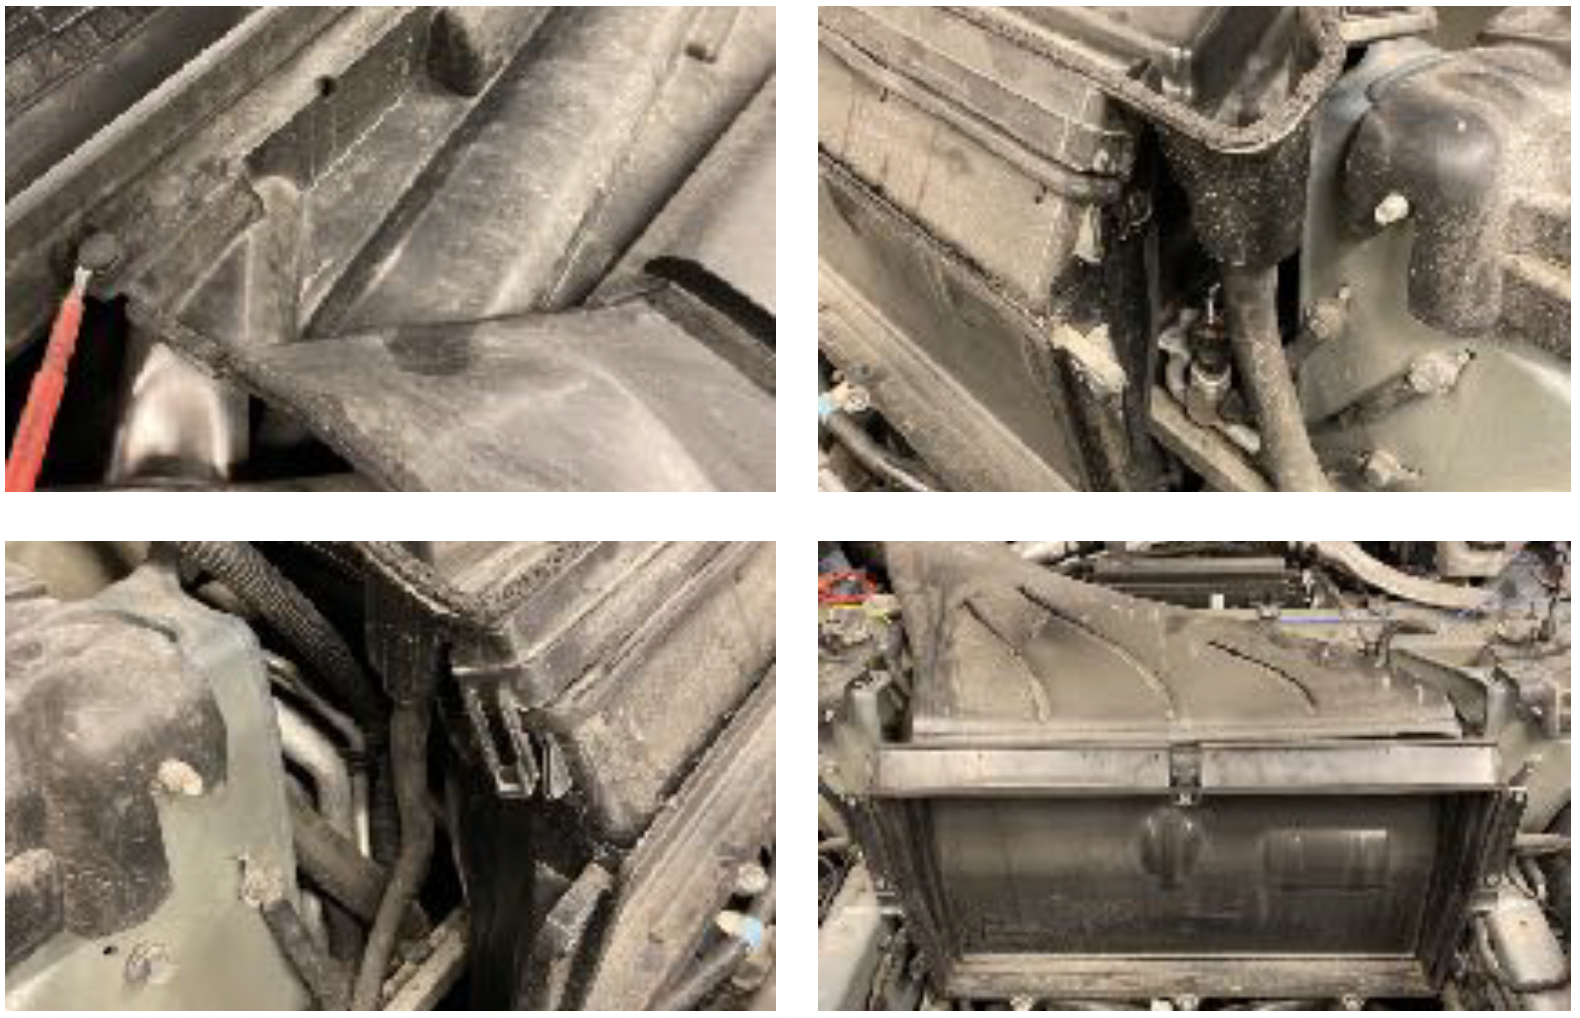
Release the drain cover by removing the 3 clips towards the windscreen, loosen the drain hoses on both sides, and release the clips that secure the drain cover to the filter box for the HEPA filter (the box is there even if the car does not have a HEPA filter) Lift off the drain cover.
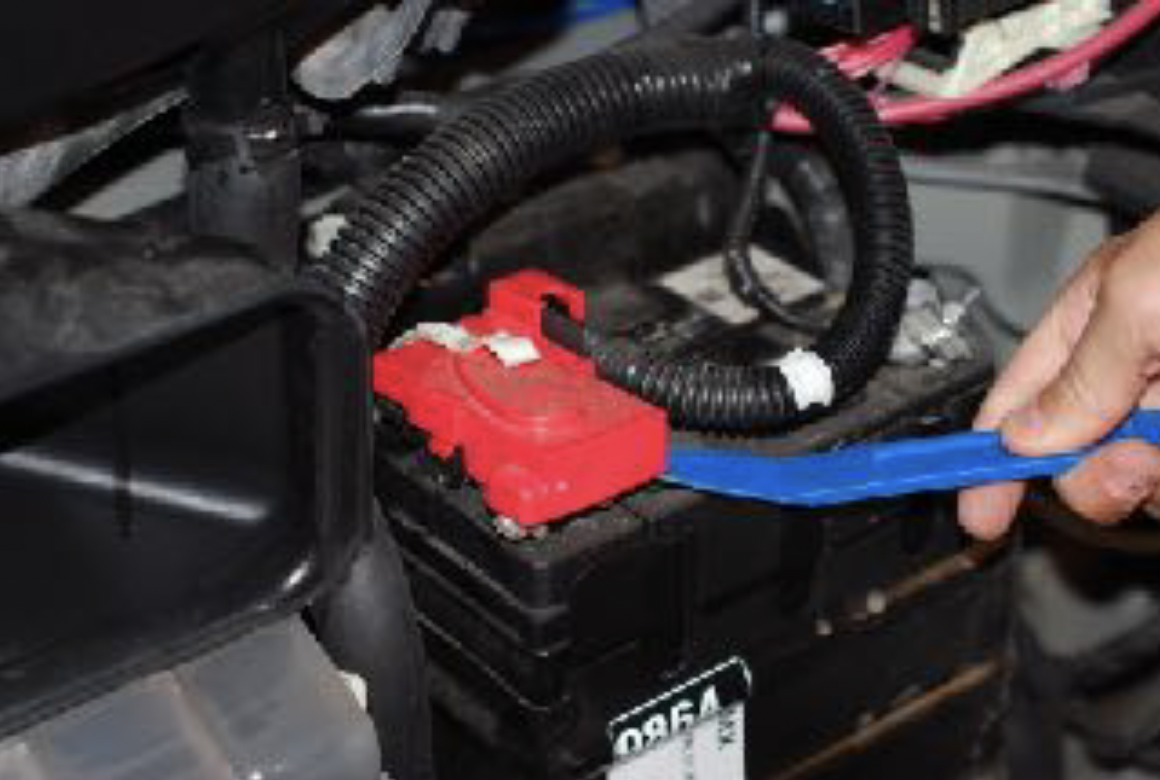
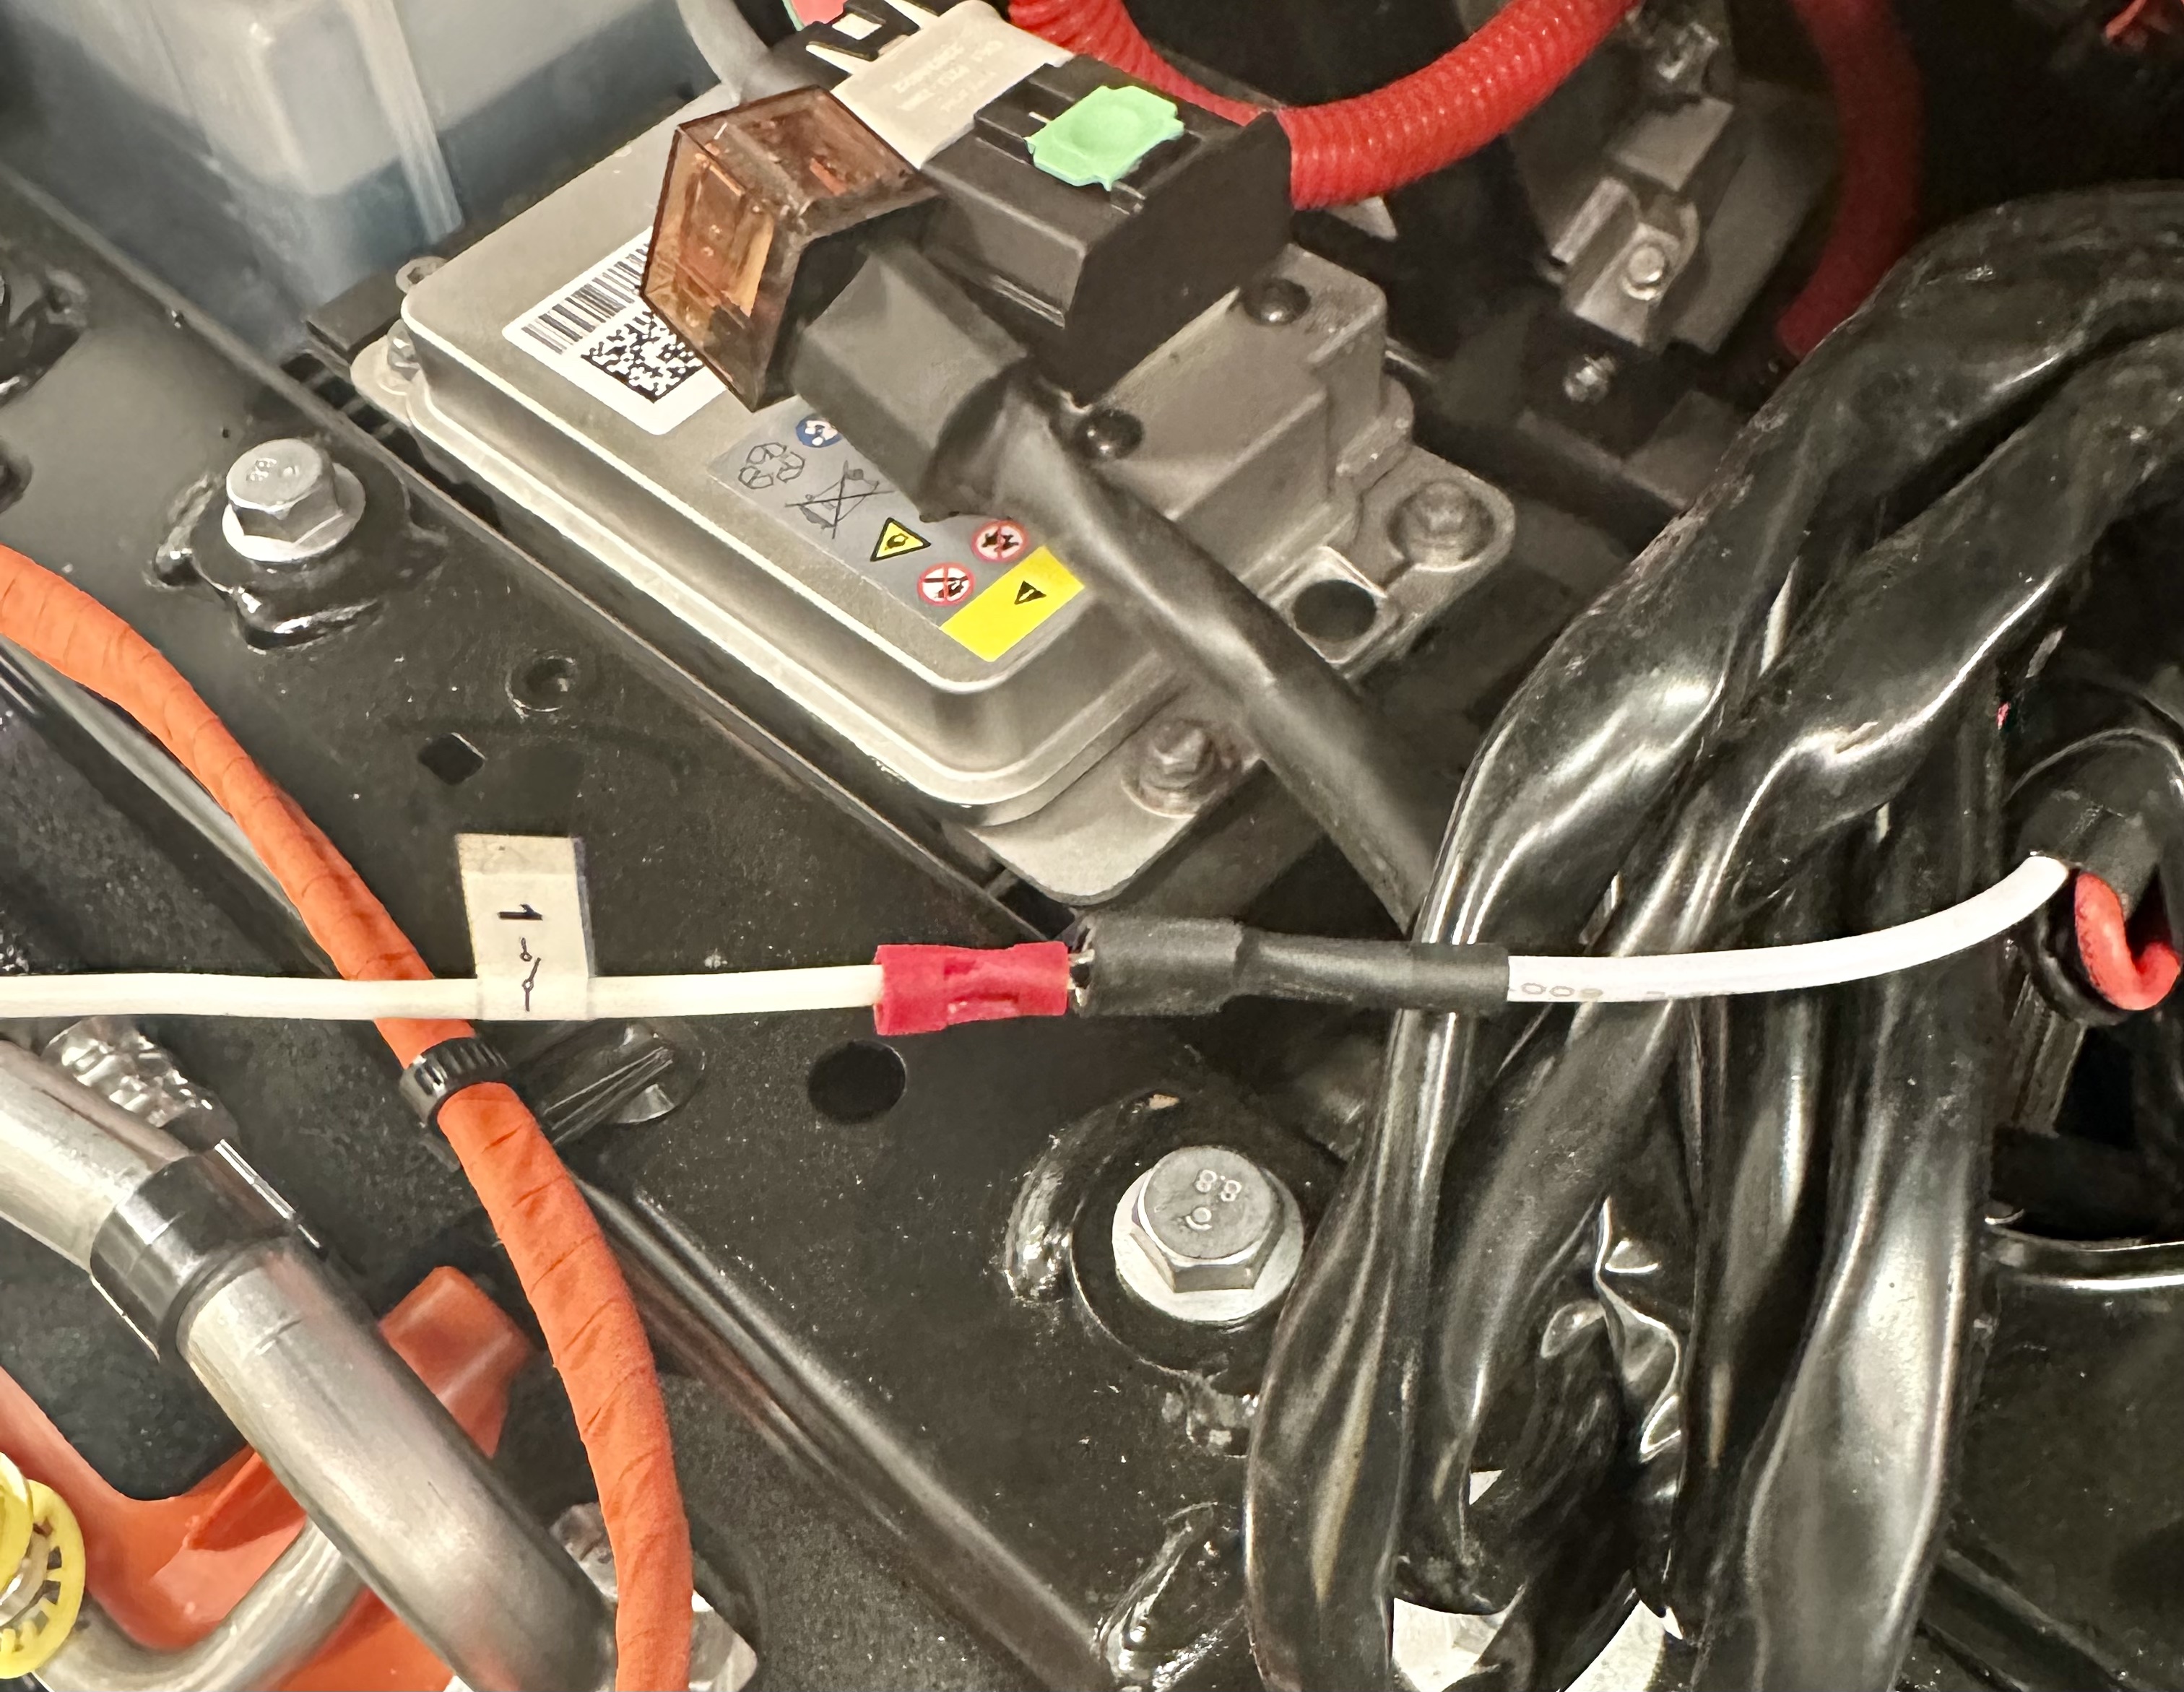
- Remove the protective cover from the +12V pole of the battery.
Installation of ALC and power
This procedure only deals with the current version of ALC, and Lumen relay sets. The ALC must always be connected together with the relay set before the remaining connections to the car and the 12V battery are made.
Connect the relay wiring harness with the ALC control power adapter as follows:
- Remove rocker switch from relay wiring harness
- Connect the white wire from the ALC to the white wire from the relay kit (high beam control current) by sliding the male and female off the flat pins together.
- The excess flat pins from the relay kit should not be used. Tape over to avoid current leakage between these two
Connection of +12V and earth.
- Connection +12V
- Connect the red wires, each with its own fuse holder and ring shoe, from the ALC and relay set respectively directly to the (+) pole of the battery. The nut is loosened with a 12 mm socket and ratchet, or spanner.
- Earth connection
- First connect the ring shoe from the black wire on the relay set to ground. Depending on the model year, you will find the grounding point in different places. In the meantime, the points are no more than 10-15 cm from the 12V battery in your car. The bolt is loosened with a 13 mm pipe and ratchet, or a hex key.
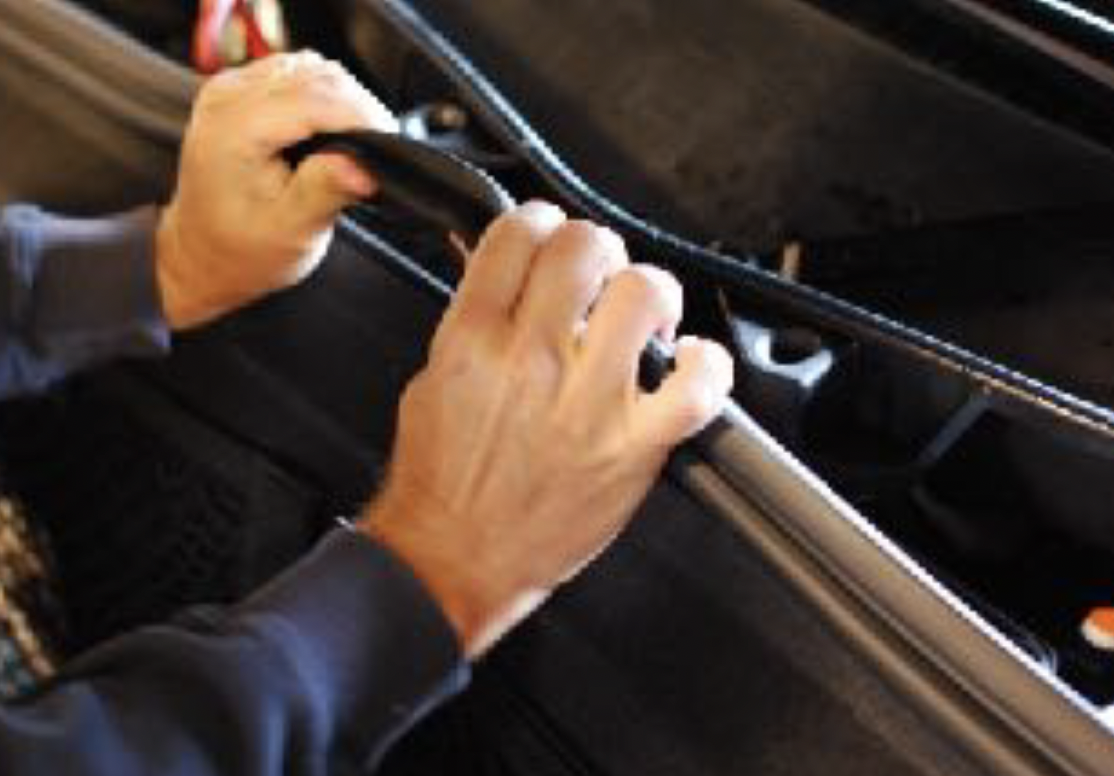
The ALC is then connected to the car's headlight. For practical reasons, this is most easily done on the driver's side
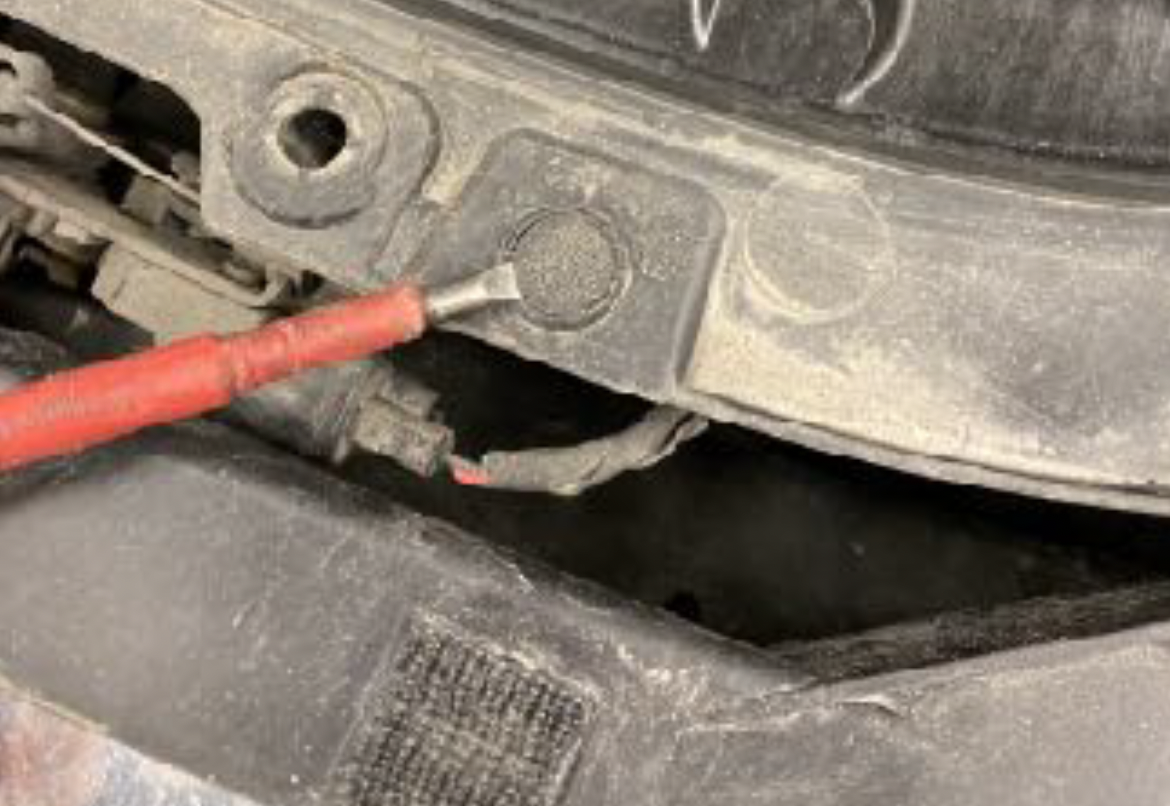
- Disconnect the original connector from the lamp on the driver's side
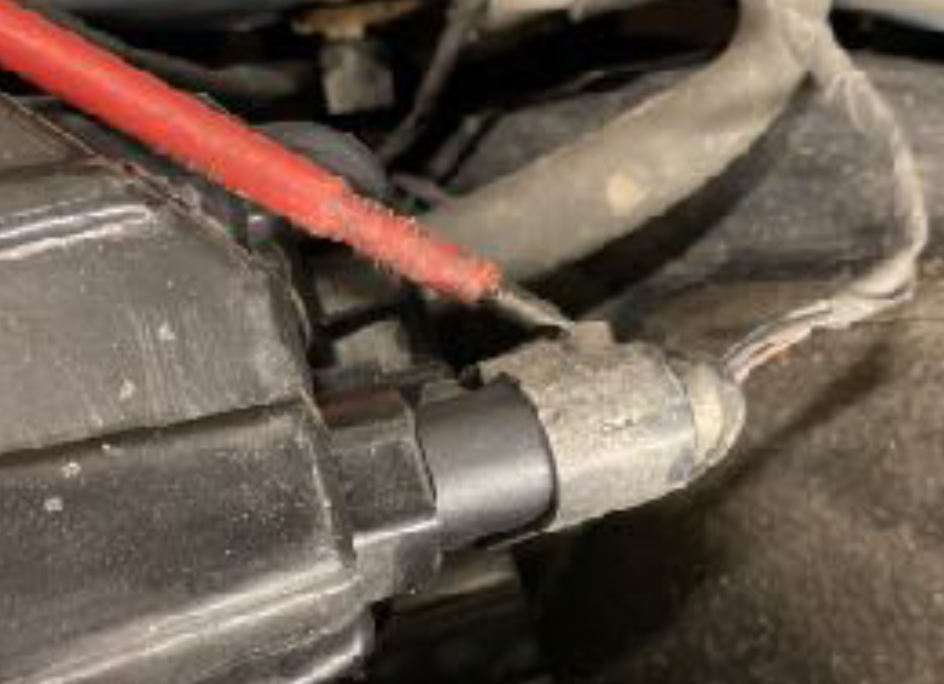
- Then connect the male connector from the T-connector from the ALC to the car's headlight
- Finally, plug the original connector back into the female connector of the T-connector
NB! The guide pins in the contacts can in some cases be difficult to get to fit with the guide grooves in the opposite contact. Try to move the guide pins a little until you hit the guide tracks.
Connect the auxiliary light to the relay wiring harness and test the functionality before proceeding to the next point. Best tested by using the light horn - pull the light lever towards you and check that the led bar is activated together with the car's original main beam.
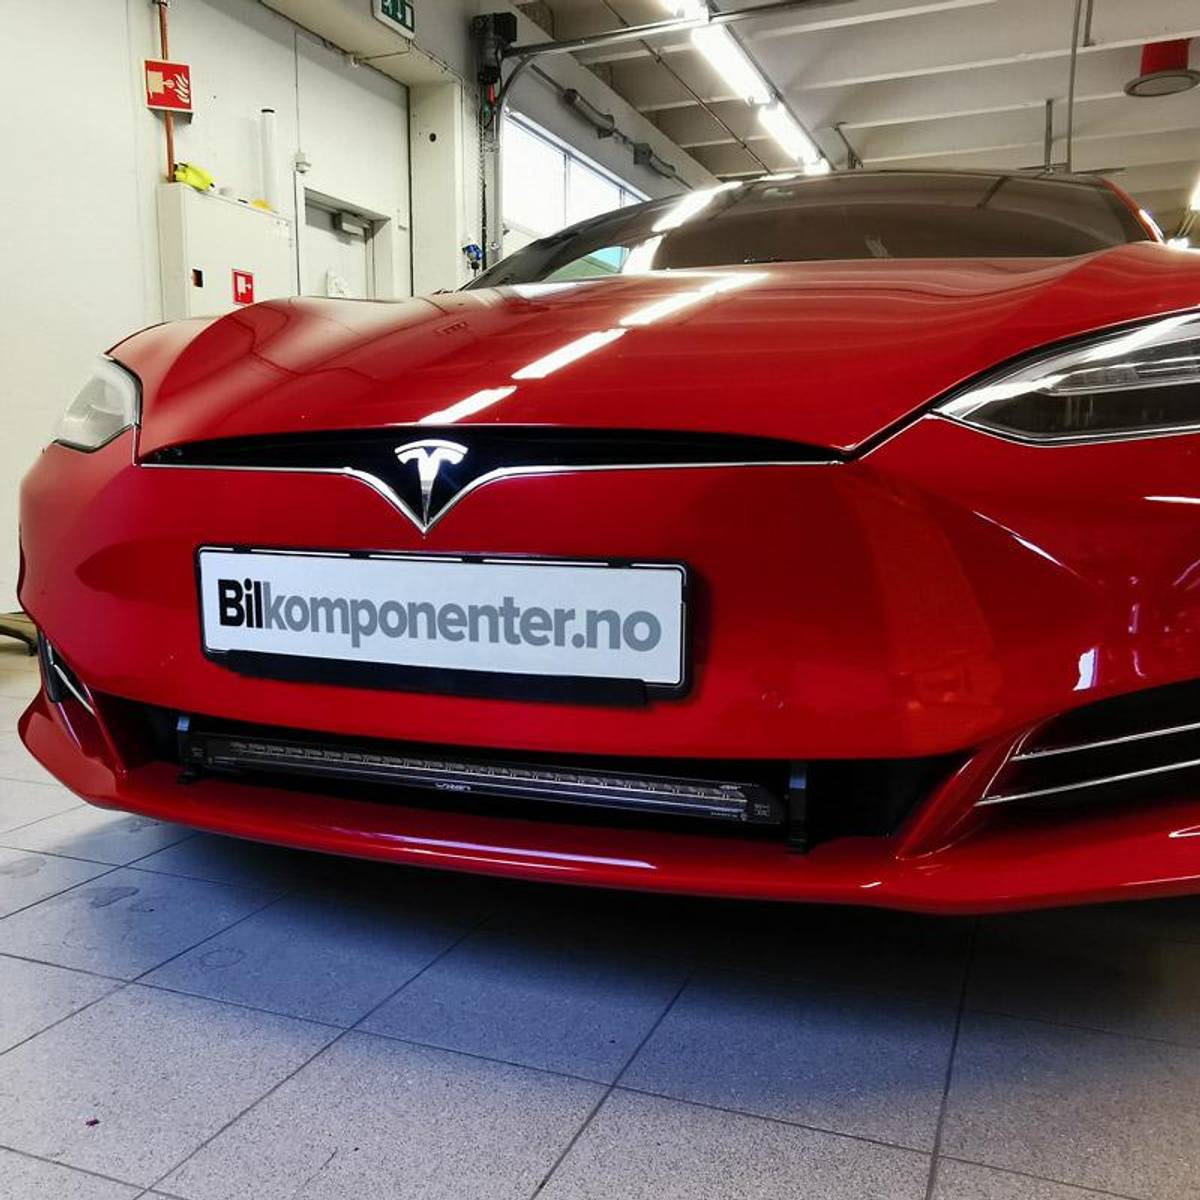
Installation of hinged bar
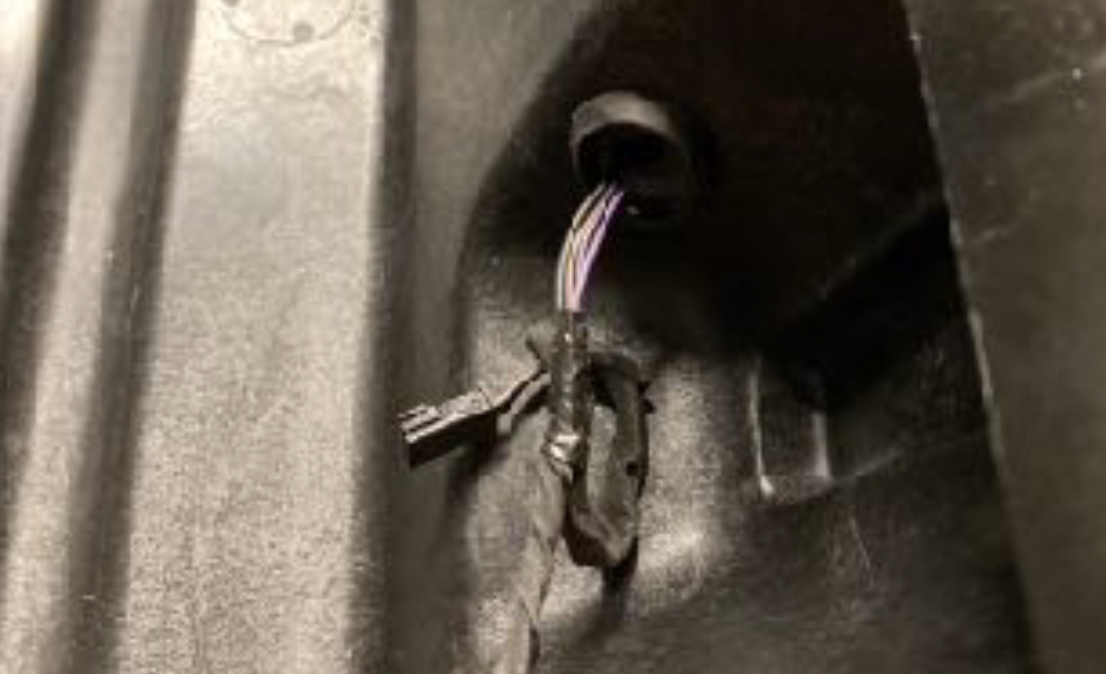
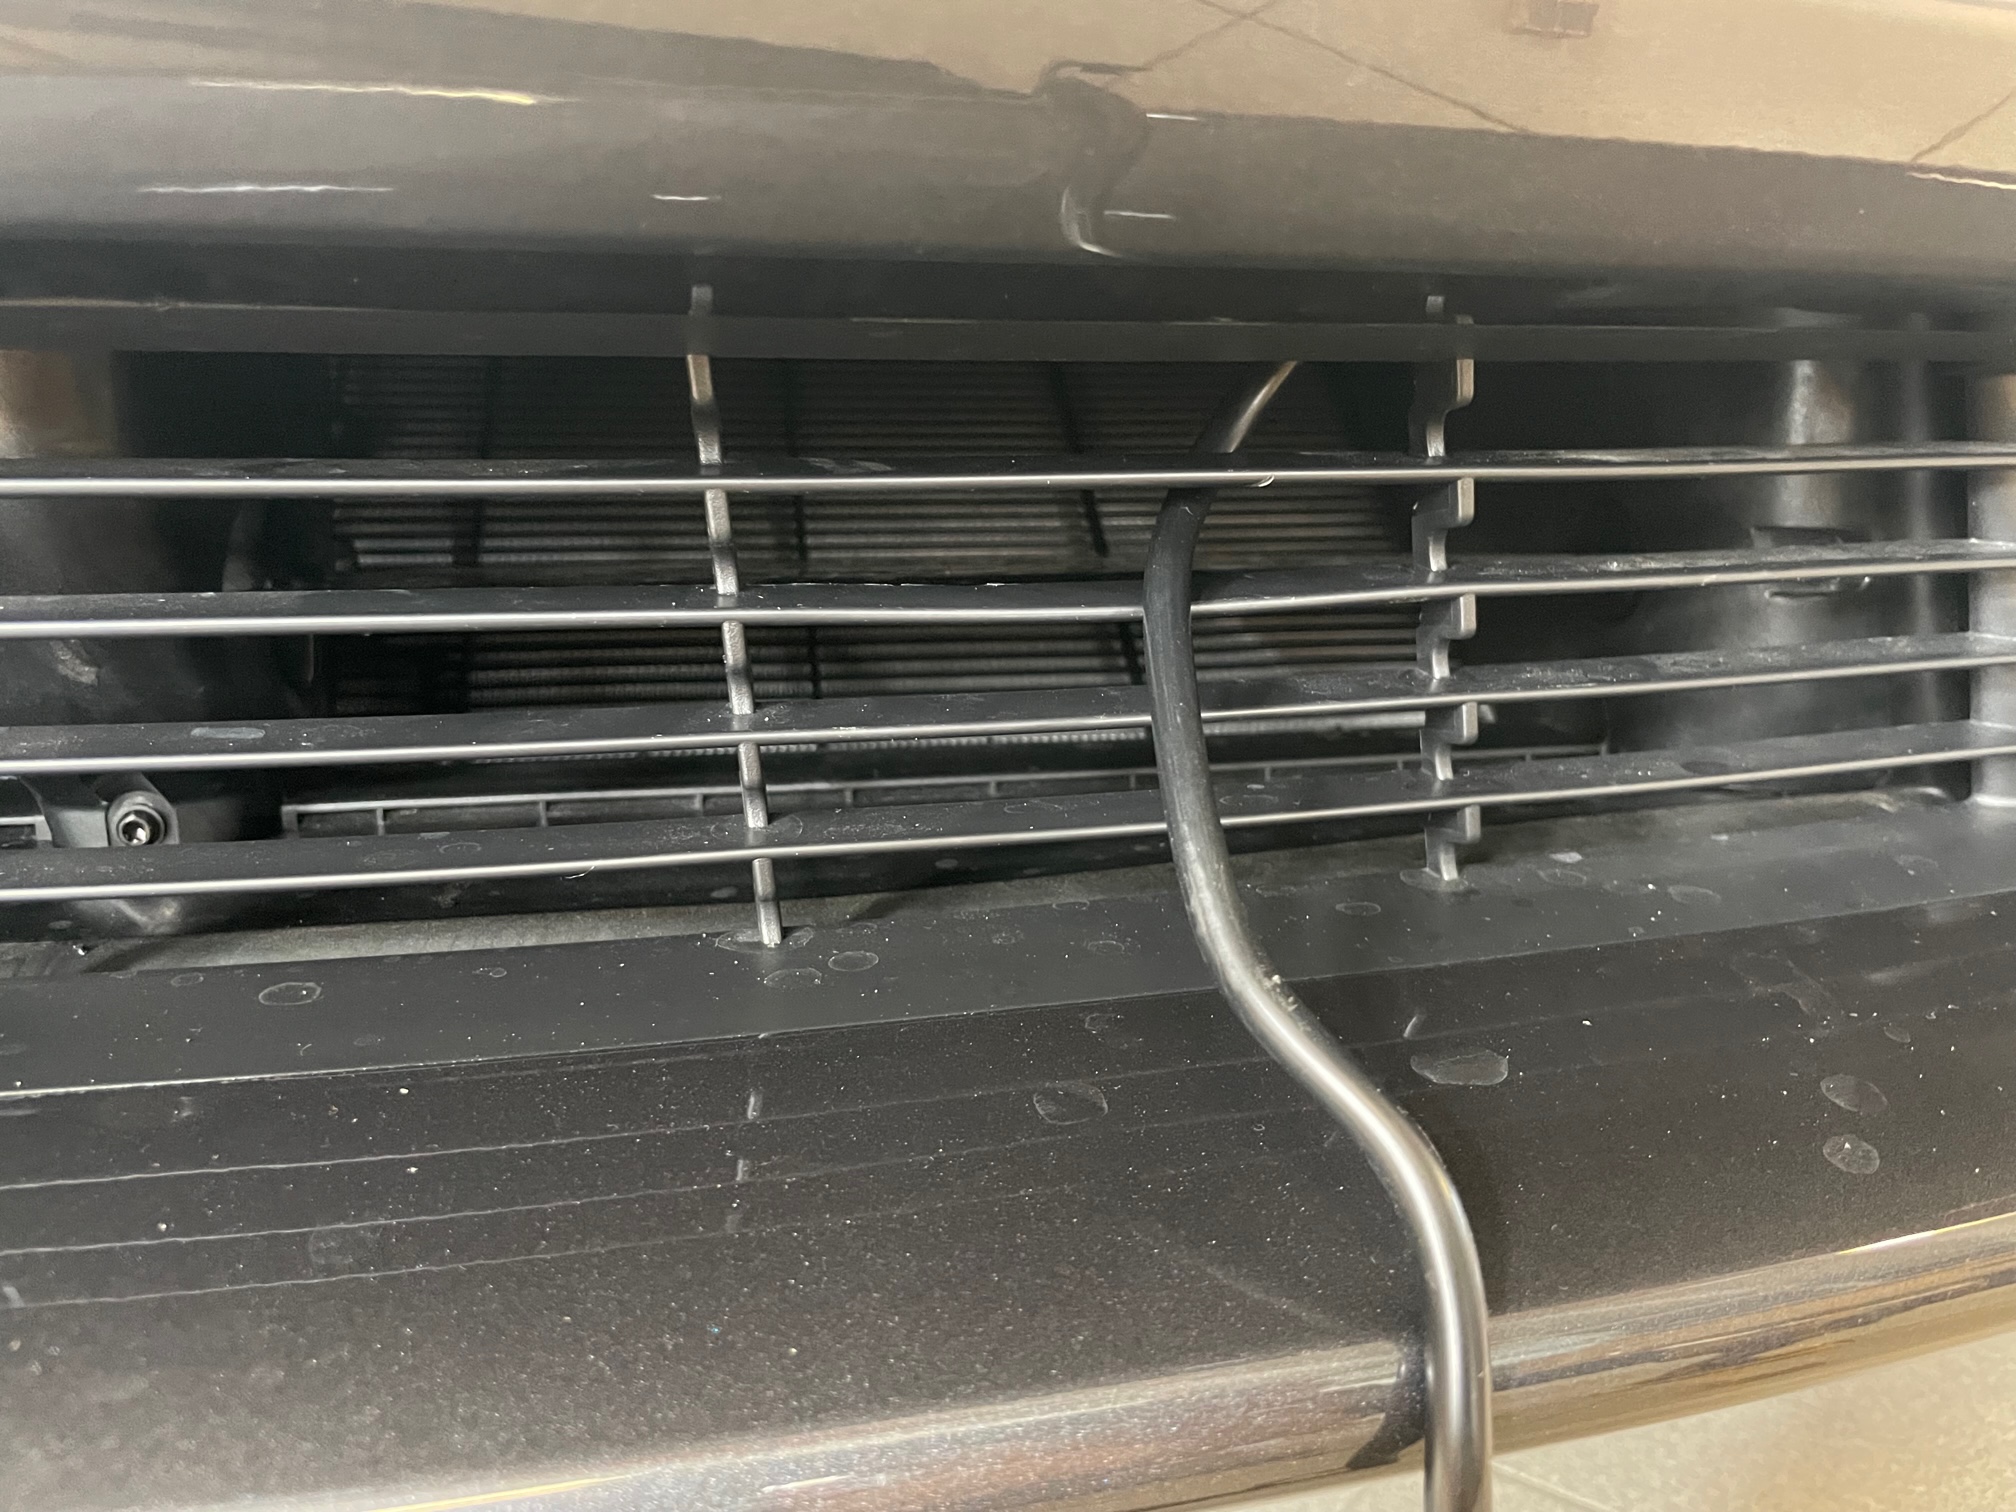
- Thread the lamp's connector through the grill from the outside, and into the frunk. The cable and connector are threaded from the underside between the rubber seal and the air intake. Feel your way with your fingers and press the contact between them into the freckle.
- Pull a bit of the cable so that you can easily connect the led bar's connector to the relay set. The cable is carefully tightened, and possibly stripped to the grill so that the cable does not get pinched.
- Screw the included fasteners to each end of the lantern. The mounts are marked with "L" (left) and "R" (right - driver's side)
- Center the lantern in relation to the sign, and measure a depth of approx. 5cm from the lower foot of the mounts out to the edge of the front bumper. Make sure that the lamp does not touch the grill at the rear. If you place the lantern too far in so that it touches the grill, this will cause difficulties in adjusting the light afterwards
- Mark with tape on the outer edge, and in depth before pre-drilling the two screw holes. Remember that the drill you use must be smaller than the diameter of the screw.
- Screw in the screws - tighten with a maximum of 2 Nm, otherwise the fasteners will crack.
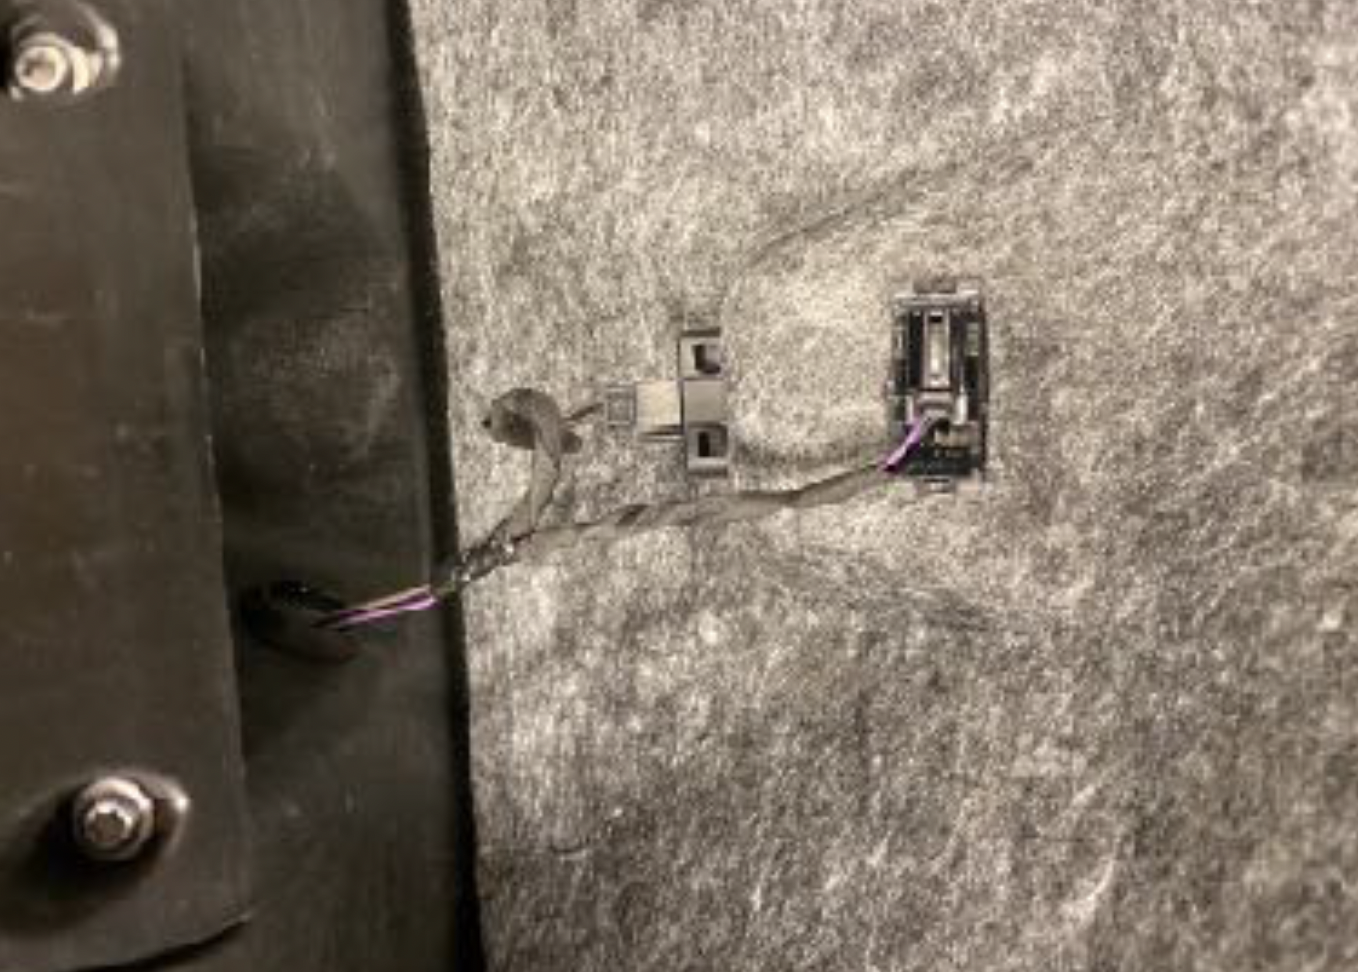
Test the light again, then attach the ALC box with double-sided tape to the "wall" behind and to the right of the light. Make sure that the contacts between the car, ALC and lamp are not hanging with a so-called drip edge.
Drip edge - To avoid this. Fix the connectors as flat as possible - use e.g. strips - and then let the wires go out and down on either side of the connectors. This is very important to prevent moisture from entering the contacts over time.
Coil up any overhanging cables and bundle them together with strips. Place the overshooting cable to the right of the 12V battery.
Make sure that the relay on the relay wiring harness points upwards so that water will never be able to flow into the relay.
Secure the rest of the cables with strips or similar. to prevent them from getting pinched under the drain pan etc. Use heat shrink/tape on the connections between relay and ALC
Fit the frunk tub etc in the opposite order.
Troubleshooting
Should the led bar not work together with the car's original main beam, check the following before contacting us:
- If the car's original headlight is continuously on. Go directly to the point regarding moisture in contact between ALC, lamp and car. If not, go to the point below.
- Check that ALC has not been deactivated by accident, or during a light show, this is done as follows:
- Car parked with gear in "P"
- Start the car by pressing the brake (release your foot from the brake after the car is on).
- Turn off "auto high beams".
- Turn off all external lights from the screen.
- Within 4 seconds after the lights have turned off, flash the light horn 6 times. Make sure the lever is released back to the home position between each flash.
- The led bar should now acknowledge with 3 flashes of light / 3 clicks in the relay - if not continue.
Is the joint bar still not working?
- Check the fuse on the relay wiring harness. If the fuse has blown, replace the fuse. If the fuse is complete, go to the next point.
- Check the relay itself by pulling it loose from the wiring harness, and look for corrosion or rust on the "legs" of the relay. If the relay is broken, replace it. If the relay is OK, go to the next point.
- Check all connections between 12V battery, relay harness, and ALC. Do you find bad connections or irr/rust. Correct the error and test the joint bar. If everything looks good, go to the next point.
- Check the function of the led bar by holding the current cable from the relay set directly against the battery's +12V pole. This must only be done when the control power cable is disconnected from the ALC. The led bar should now light up. If you get light this way, go to the next point.
- Measure with a multimeter or test lamp whether the ALC outputs control current on the white wire from the ALC when the ALC is connected to the lamp and +12V, and the main beam on the car is active. If you do not get control power here - carry out the procedure that activates ALC one more time. If you get control current from the ALC, see below.
If all the steps above fail, there is probably moisture in one of the contacts between the ALC and the car, or in the contacts between the relay set and the led. If so, disconnect these from each other and look for moisture, dirt or other things that could cause poor contact.
Still not finding any obvious errors? Contact us at support@bilkomonenter.no with information about your order number, which troubleshooting steps have been completed, and as much information about your problems as possible.
Function / Settings
When set to Auto (default on delivery), ALC will ensure that the led bar is turned on and off together with the car's original main beam. In special weather conditions such as heavy fog or heavy snow, it may be necessary to temporarily deactivate the joint bar.
Temporary deactivation is done as follows:
While driving, the car's lights in "AUTO" (in the light menu on the car)
- Deactivation of led bar / OFF
- Pull the lever for high beam (light horn) towards you 6 times within 4 seconds
- The led bar will now not switch on together with the car's main beam
- Activation of led / Auto
- Pull the lever for high beam (light horn) towards you 6 times within 4 seconds
- After activation, the led bar will switch on together with the car's main beam.
If ALC is temporarily deactivated while driving, ALC will automatically return to "AUTO" (basic setting) when the car has been locked and entered so-called sleep. This usually happens after approx. 10-20 min.
Should you wish to change the basic setting from AUTO to OFF on ALC - this procedure is also used to set ALC back to AUTO if it has previously been set to OFF during a light show or otherwise.
The procedure is as follows:
- Car parked, and on (press the brake once to start the car, then release the brake).
- Put the gear selector in "P".
- Press the light menu on the screen.
- Switch off automatic high beams if you have this activated.
- Set the lights to "OFF".
- Within 4 seconds after the main lights are switched off:
- Flash the light horn 6 times
NB! Remember that the led bar will now not come on with main beam at start-up. To reverse the settings in ALC back to AUTO, repeat the procedure.
In normal use, it is not recommended to change the basic setting on ALC.